Winlocker (Trojan.Winlock) is a computer virus that blocks access to Windows. After infection, it prompts the user to send an SMS to receive a code that restores the computer’s functionality. It has many software modifications: from the simplest ones - “implemented” in the form of an add-on, to the most complex ones - modifying the boot sector of the hard drive.
Warning! If your computer is locked by a Winlocker, do not under any circumstances send SMS or transfer money to receive an OS unlock code. There is no guarantee that it will be sent to you. And if this happens, know that you will give your hard-earned money to the criminals for nothing. Don't fall for the tricks! The only correct solution in this situation is to remove the ransomware virus from your computer.
Removing a ransomware banner yourself
This method is applicable to winlockers that do not block loading the OS in safe mode, the registry editor and the command line. Its operating principle is based on the use of system utilities exclusively (without the use of anti-virus programs).
1. When you see a malicious banner on your monitor, first turn off your Internet connection.
2. Reboot the OS in safe mode:
- when the system reboots, hold down the “F8” key until the “Additional boot options” menu appears on the monitor;
- Using the cursor arrows, select “Safe Mode with Command Line Support” and press “Enter.”
Attention! If the PC refuses to boot into safe mode or the command line/system utilities do not start, try removing Winlocker using another method (see below).
3. At the command prompt, type the command - msconfig, and then press "ENTER".

4. The System Configuration panel will appear on the screen. Open the “Startup” tab in it and carefully review the list of elements for the presence of a Winlocker. As a rule, its name contains meaningless alphanumeric combinations (“mc.exe”, “3dec23ghfdsk34.exe”, etc.) Disable all suspicious files and remember/write down their names.
5. Close the panel and go to the command line.
6. Enter the command “regedit” (without quotes) + “ENTER”. After activation, the Windows Registry Editor will open.
7. In the “Edit” section of the editor menu, click “Find...”. Write the name and extension of the Winlocker found in startup. Start the search using the “Find next...” button. All entries with the name of the virus must be deleted. Continue scanning using the "F3" key until all partitions have been scanned.
8. Right there in the editor, moving along the left column, look at the directory:
HKEY_LOCAL_MACHINE\Software\Microsoft\Windows NT\Current Version\Winlogon.
The “shell” entry must have the value “explorer.exe”; the “Userinit” entry is “C:\Windows\system32\userinit.exe,”.
Otherwise, if malicious modifications are detected, use the “Fix” function (right mouse button - context menu) to set the correct values.
9. Close the editor and go to the command line again.
10. Now you need to remove the banner from your desktop. To do this, enter the command “explorer” (without quotes) in the line. When the Windows shell appears, remove all files and shortcuts with unusual names (that you did not install on the system). Most likely, one of them is a banner.
11. Restart Windows normally and make sure that you were able to remove the malware:
- if the banner has disappeared, connect to the Internet, update the installed antivirus database or use an alternative antivirus product and scan all partitions of the hard drive;
- if the banner continues to block the OS, use another removal method. Perhaps your PC has been hit by a Winlocker, which is “fixed” in the system in a slightly different way.
Removal using antivirus utilities
To download utilities that remove Winlockers and burn them to disk, you will need another, uninfected computer or laptop. Ask a neighbor, comrade or friend to use his PC for an hour or two. Stock up on 3-4 blank discs (CD-R or DVD-R).
Advice! If you are reading this article for informational purposes and your computer, thank God, is alive and well, still download the healing utilities discussed in this article and save them on disks or a flash drive. A prepared “first aid kit” doubles your chances of defeating a viral banner! Quickly and without unnecessary worries.
1. Go to the official website of the utility developers - antiwinlocker.ru.
2. On the main page, click the AntiWinLockerLiveCd button.
3. A list of links for downloading program distributions will open in a new browser tab. In the “Disk images for treating infected systems” column, follow the link “Download the AntiWinLockerLiveCd image” with the number of the older (new) version (for example, 4.1.3).
4. Download the image in ISO format to your computer.
5. Burn it to DVD-R/CD-R in ImgBurn or Nero using the “Burn image to disc” function. The ISO image must be burned unpacked to create a bootable disk.
6. Insert the disc with AntiWinLocker into the PC in which the banner is running rampant. Restart the OS and go into the BIOS (find out the hotkey to enter in relation to your computer; possible options are “Del”, “F7”). Set to boot not from the hard drive (system partition C), but from the DVD drive.
7. Restart your PC again. If you did everything correctly - correctly burned the image to disk, changed the boot setting in the BIOS - the AntiWinLockerLiveCd utility menu will appear on the monitor.

8. To automatically remove the ransomware virus from your computer, click the “START” button. That's all! No other actions are needed - destruction in one click.
9. At the end of the removal procedure, the utility will provide a report on the work done (which services and files it unblocked and disinfected).
10. Close the utility. When rebooting the system, go into the BIOS again and specify booting from the hard drive. Start the OS in normal mode and check its functionality.
WindowsUnlocker (Kaspersky Lab)
1. Open the page sms.kaspersky.ru (office website of Kaspersky Lab) in your browser.
2. Click the “Download WindowsUnlocker” button (located under the inscription “How to remove the banner”).
3. Wait until the Kaspersky Rescue Disk boot disk image with the WindowsUnlocker utility is downloaded to your computer.
4. Burn the ISO image in the same way as the AntiWinLockerLiveCd utility - make a bootable disk.
5. Configure the BIOS of a locked PC to boot from a DVD drive. Insert the Kaspersky Rescue Disk LiveCD and reboot the system.
6. To launch the utility, press any key, then use the cursor arrows to select the interface language (“Russian”) and press “ENTER”.
7. Read the terms of the agreement and press the “1” key (agree).
8. When the Kaspersky Rescue Disk desktop appears on the screen, click on the leftmost icon in the taskbar (the letter “K” on a blue background) to open the disk menu.
9. Select “Terminal”.

10. In the terminal window (root:bash), near the “kavrescue ~ #” prompt, enter “windowsunlocker” (without quotes) and activate the directive with the “ENTER” key.
11. The utility menu appears. Press "1" (Unlock Windows).
12. After unlocking, close the terminal.
13. There is already access to the OS, but the virus is still free. To destroy it, do the following:
- connect to the Internet;
- launch the “Kaspersky Rescue Disk” shortcut on your desktop;
- update antivirus signature databases;
- select the objects that need to be checked (it is advisable to check all elements of the list);
- left-click to activate the “Scan objects” function;
- If a ransomware virus is detected, select “Delete” from the proposed actions.
14. After treatment, in the main menu of the disk, click “Turn off”. When the OS restarts, go into the BIOS and set to boot from the HDD (hard drive). Save your settings and boot Windows as normal.
Computer unlocking service from Dr.Web
This method involves trying to force the winlocker to self-destruct. That is, give him what he requires - an unlock code. Naturally, you don’t have to spend money to get it.
1. Write down the wallet or phone number that the attackers left on the banner to purchase the unlock code.
2. Log in from another, “healthy” computer to the Dr.Web unlocking service - drweb.com/xperf/unlocker/.

3. Enter the rewritten number in the field and click the “Search codes” button. The service will automatically select an unlock code according to your request.
4. Rewrite/copy all codes displayed in the search results.
Attention! If you can’t find any in the database, use Dr.Web’s recommendation for removing Winlocker yourself (follow the link located under the message “Unfortunately, at your request...”).
5. On the infected computer, enter the unlock code provided by the Dr.Web service into the banner “interface”.
6. If the virus self-destructs, update your antivirus and scan all partitions of your hard drive.
Warning! Sometimes the banner does not respond to entering the code. In this case, you need to use another removal method.
Removing the MBR.Lock banner
MBR.Lock is one of the most dangerous winlockers. Modifies the data and code of the master boot record of the hard disk. Many users, not knowing how to remove this type of banner ransomware, begin to reinstall Windows in the hope that after this procedure their PC will “recover.” But, alas, this does not happen - the virus continues to block the OS.
To get rid of MBR.Lock ransomware, follow these steps (option for Windows 7):
1. Insert the Windows installation disc (any version or build will do).
2. Go to the computer’s BIOS (find out the hotkey for entering the BIOS in the technical description of your PC). In the First Boot Device setting, set “Cdrom” (boot from a DVD drive).
3. After the system restarts, the Windows 7 installation disk will load. Select your system type (32/64 bit), interface language and click “Next”.
4. At the bottom of the screen, under the “Install” option, click “System Restore”.

5. In the “System Recovery Options” panel, leave everything unchanged and click “Next” again.
6. Select the “Command Prompt” option from the Tools menu.
7. At the command prompt, enter the command - bootrec /fixmbr, and then press Enter. The system utility will overwrite the boot record and thereby destroy the malicious code.

8. Close the command prompt, and click "Restart".
9. Scan your PC for viruses using the Dr.Web CureIt! or Virus Removal Tool (Kaspersky).
It is worth noting that there are other ways to treat a computer from Winlocker. The more tools you have in your arsenal to combat this infection, the better. In general, as they say, God protects the careful - do not tempt fate: do not go to dubious sites and do not install software from unknown manufacturers.
Let your PC avoid ransomware banners. Good luck!
Hello readers of the ComService company blog (Naberezhnye Chelny). In this article we will look at ways to remove a banner from your desktop. This can happen not only due to visiting sites with erotic content, but also when using cracks or keygens downloaded from unknown sources. Therefore, try to download software only from manufacturers' websites. If you receive a suspicious file, do not be lazy and . Typically, such banners are called extortionists, as they demand money from the user. This can be like sending an SMS to a short number or topping up an account in an electronic payment system. Fraudsters usually write on such banners that the user has violated the law, for which they are required to pay a fine. In this article we will tell you how to unblock your computer from such banners.
Article structure
Introduction
These services are easy to use, but there are no guarantees. You can spend a lot of time but still not unlock the system. But you definitely need to try it.
To use, you need a device (another, tablet or phone) with Internet access. Go to any of the listed addresses. Let's take Kaspersky for example.

In a special field you must enter the phone number or account to which you want to transfer money. If you are asked to send an SMS to a short number, then write down this number and the text that needs to be sent, separated by a colon. Afterwards, click Get code
The search results will appear below. Choose your banner and try the codes against it.

If you haven’t found your banner, try on the Dr.Web or Eset website. If this method did not help remove the banner from your desktop, read on.
2. Use System Restore
This option is good if you have this function enabled. If it was disabled, proceed to the next step.
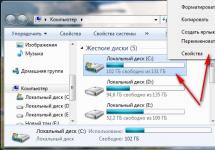
In order to remove the banner from the desktop using system recovery, restart the computer and press F8 several times when loading. If a list of devices from which booting is possible appears, select your drive ( or ) and continue pressing F8 again. You should see a similar picture below. You need to select the System Troubleshooting option highlighted by default

A window will load where you need to select a language, then a user. Next there will be a window with a choice of several recovery options. Choose System Restore. Then select a restore point and return the computer to that point in time. First, take the nearest restore point; if that doesn’t help, restore to an earlier one.
You can read more about how to use System Restore.
3. Remove the banner from safe mode
By checking Dr.Web Cureit or analogues
There are banners that are not active in . You need to take advantage of this. To prepare for treatment, you need to download the Dr.Web Cureit utility on a healthy computer by opening the following link in your browser.
To remove a banner from your desktop by cleaning the registry, you need to check several points in the registry.
On the left side of the window go to the address
HKEY_CURRENT_USER -> Software -> Microsoft -> Windows -> CurrentVersion -> Run

Go to the right side and delete all items except one (Default) for which the value is not assigned. Right-click on the item and select Delete. With this action we will remove the banner from Windows startup. (You can read how to control startup of Windows 7 and Windows 8 when the computer is in working order.)
All the above steps must also be performed in the section
HKEY_LOCAL_MACHINE -> Software -> Microsoft -> Windows -> CurrentVersion -> Run
There are two more places left to check
HKEY_CURRENT_USER -> Software -> Microsoft -> Windows NT -> CurrentVersion -> Winlogon
In this we check the absence of Shell and Userinit items. If they are there, delete them.
HKEY_LOCAL_MACHINE -> Software -> Microsoft -> Windows NT -> CurrentVersion -> Winlogon
check the values of the above points
Shell = explorer.exe
Userinir = C:Windowssystem32userinit.exe, (comma required)

If the values are different, we correct them to the correct ones.
We close the registry editor and, to be on the safe side, check the computer with the utility, or if you haven’t checked it before editing the registry.
After checking, reboot in normal mode and check whether the banner is removed.
4. Use Kaspersky WindowsUnlocker to remove a banner from the desktop
Using this utility, you can disinfect all operating systems installed on your computer. It does automatically what we did manually in the previous paragraph. This utility is included in Kaspersky Rescue Disk.
You can download the Kaspersky Rescue Disk image from the official website here
To record to a USB device, it is better to use the utility from the manufacturer

In the program window, use the Browse button to specify the path to the Kaspersky Rescue Disk image. You insert the USB drive into the computer and it immediately appears in the appropriate section. If this does not happen, select it manually.
Attention! Save all important data from your USB drive.
After all the settings, press the START button

The image will be written to the USB drive. If the process completes successfully you will see the following window. Click OK and close the rescue2usb program

Now you need to boot from the prepared USB drive on the infected computer. To do this, insert the USB flash drive into the computer and reboot. When you boot your computer, press F8 several times to bring up a list of devices that can boot from. Select the connected USB drive. (There may be two inscriptions in this list suggesting booting from USB. Try one first, then the other). If you can’t boot from a flash drive, you need to set boot from a USB drive in the BIOS. You can read how to do this.
After all the settings, it will boot from the USB drive and you will see the following window. You must press any key within 10 seconds

Select the required language using the arrows on the keyboard

You must accept the license by pressing button 1 on the keyboard
Select the Kaspersky Rescue Disk download mode. If you don't have a mouse, choose text. In all other cases, select graphics mode


In the terminal, type windowsunlocker and press Enter

If you chose text mode, then use the F10 key to close the menu that appears and type windowsunlocker in the line under the file manager. Press Enter

To remove the banner from the desktop, press 1


After all the manipulations, you must press 0 - Exit.
After unlocking the operating system, you need to update the Kaspersky Rescue Disk databases and perform a full scan of your computer. To do this, open the main menu and select Kaspersky Rescue Disk. Go to the update tab and click Run update. In this case, the Internet must be connected to computer

Go to the Scan objects tab and select all objects in the field 2. Click Scan objects
Wait until the scan is completed and delete or disinfect any malicious files found. Afterwards, reboot in normal mode and check whether the banner is removed from the desktop.
5. Fixing the boot record
If the virus loads immediately when you turn on the computer before the operating system logo appears, then this infection has changed the boot record of your drive.
You need to go to the Windows Recovery Console and try to restore the boot record.
To open the recovery console, you must press the F8 key at boot, as if you were selecting safe mode. When a window appears with a choice of download options. At the very top, the item selected by default will appear - Troubleshoot system problems. Select this item by pressing Enter
A selection window will then appear user and entering your password. Select a user and enter a password if you have one and click Next
A window will then appear with system recovery options. There you can choose to restore the computer from an image (which is done in Windows) or execute (if it is enabled. See point 3 of this article) and much more. You select the last item Command Prompt.
In it you type BOOTREC.EXE /FixBoot
Then reboot and check whether the banner has been removed from the desktop.
6. Check the drive on a healthy computer
If you have the opportunity to test your drive on another computer do it.
Turn off your computer. Disconnect. With it turned off, connect it to another computer. Boot up. Update your anti-virus databases and scan the connected disk for viruses. I like this option the most because it is possible. If it is not there, use the options described above.
I hope it won't come to a reinstallation and it will help you Which-something described above.
Conclusion
In this article on how to remove a banner from the desktop, we looked at a lot of ways to successfully unlock the operating system. The main thing we need to understand is that there is no need to send any SMS or top up any accounts.
Of course, it’s worth starting the unlocking process by using the services provided by large antivirus companies. Such services are described in the first part of this article. The next best thing to do is to restore the system one, two or three times back. In general, the service can be of great help in critical situations. I highly recommend turning it on and allocating several gigabytes for it in the settings. If recovery fails, then proceed to treatment in. Unless, of course, the virus blocks everything there with its banner.
If safe mode does not work, then Kaspersky WindowsUnlocker as part of Kaspersky Rescue Disk is an excellent solution. If possible, you can and should check your drive on the healthy machine of your relative, friend or neighbor. Don't worry, the virus won't jump to another computer. If the virus is registered in the boot record, then try through the recovery console. If all else fails (which is unlikely), then it is better to reinstall the operating system.
Video on how to unlock a computer from a banner Thanks for sharing the article on social media. All the best!
Users who do not use reliable antivirus protection for Windows may experience problems with their computer or desktop being blocked from loading by malware that they require you to send an SMS with a text to a specific number to receive an unlock code.
Never fall for SMS scammers. The cost of a sent SMS is usually several hundred rubles, but the user does not always receive a code for this money (often SMS extortionists do not involve sending any codes at all); even more rarely, the received code helps to unlock the system.
You can catch this joy when viewing Internet pages with “dubious” content, and you are asked to install a new version of the player or browser. An unsuspecting user agrees to the installation and thereby voluntarily installs an SMS virus on his computer.
Visually, these Trojans look like a banner window, a message about a pirated copy of your Windows, or a warning from the Ministry of Internal Affairs. Example message text: " Windows is locked. To unlock, you need to send an SMS with the text 446412302876 to the number 3786. An attempt to reinstall the system may lead to the loss of important information and disruption of the computer.", often the user is simply intimidated by the crash of the system and the loss of important data, which is not true. Trojan.Winlock also blocks the task manager, system registry, and the Internet (only access to antivirus sites can be blocked).
Always install system components, codecs, browsers or programs only from official sources; for your convenience, our website has special sections for downloading the necessary distributions from official sites.
Therefore, if you have a question: " How to unlock a computer from a banner", then we offer you the opportunity to independently remove the banner from your desktop. To do this, follow the links below to special sections of anti-virus companies to receive the code. On the site, when filling out the form, you will need to indicate what text you are asked to send, and to what number.
Windows unlock codes on antivirus company websites
- Get the unlock code for the banner on the Kaspersky website;
- Get the banner unlock code on the Doctor Web website;
- Get the banner unlock code on the NOD32 website
Update 2020
Unfortunately, the developers of these antiviruses have removed the ability to receive a code to unlock your PC. Nowadays, the current method is to remove the SMS ransomware banner using a bootable LiveCD. You can also use the Windows Unlocker utility on the Kaspersky Lab website.
Removing a banner using Windows Unlocker
Attention! Job Windows Unlocker may cause inoperability operating system.
While surfing the Internet, a user may accidentally visit a website that has been deliberately infected with a ransomware virus. If there are vulnerabilities in the Windows operating system, browser or other software, the computer’s operation is completely blocked, and a window appears on the screen with a message stating that the user has allegedly violated certain rules and his version of Windows is blocked. To unlock, you are asked to send an SMS message to the specified phone number. The cursor only moves in the window, rebooting does not help.
Removing ransomware viruses can be done in several ways. The easiest way is to use the Kaspersky Lab website: you need to log into it from another computer or under a backup OS and go to the “Removing SMS blockers” page. Next, enter the phone number to which you are asked to send an SMS into the search box and click the “Get code” button. If the required code is available, you will receive it. After that, enter it in the blocker window, Windows will be unlocked.
Unfortunately, this method does not always work. If unsuccessful, you can remove the banner using Kaspersky WindowsUnlocker. This utility can be downloaded from the same page of the Kaspersky website; it is included in the Kaspersky Rescue Disk. You need to download the disk image (its size is slightly more than 300 MB) and burn it to a CD. After this, the utility is launched from the CD when the computer starts; with its help, you can delete all SMS blocker files and restore the registry. After finishing the utility, the computer will be fully operational.
You should use Kaspersky WindowsUnlocker even if you managed to find the unlock code. The blocking virus files still remain on the computer and should be deleted.
Professional removal of blockers
Virus creators are constantly creating new versions, so there is a very high probability that you will not be able to remove the virus you encounter using standard methods. In this case, the banner will have to be removed manually, which requires a lot of experience. For example, an experienced technician might try booting the computer into safe mode with command line support. When the console becomes available, he will launch the desktop with the command explorer.exe; the virus is usually not activated with this loading method. After this, the expert will check the system registry and Windows folders and manually remove blocker files from them, which will allow the computer to be fully functional again.
If you are faced with an SMS blocker and cannot get rid of it, call us. Our specialist will come and guarantee to restore your desktop or laptop. By watching a master at work, you can learn a lot, which will allow you to deal with similar situations on your own. Call us at any time convenient for you!
1 way. To use services to combat SMS banners, simply enter the phone number to which you are asked to send SMS or to which you need to deposit money through the terminal.
In response, you will receive a code, use it to unlock your computer, and if you log in successfully, immediately scan your computer for viruses.
Method 2. Restore the operating system from previously created saves (roll back the system), for this you will need a disk with your version of the operating system.
3 way. Remove the hard drive from your computer/laptop and scan it with an antivirus on another (not infected) computer.
4 way. Remove SMS virus using Life CD, described in more detail.
5 way. Use the Kaspersky Rescue Disk utility
Kaspersky Rescue Disk 10 is a special program designed to scan and disinfect infected computers. The program is used when the level of infection is such that it is not possible to cure the computer using anti-virus programs or treatment utilities (for example, Kaspersky Virus Removal Tool) running under the operating system.
In order to use this utility, you need to burn it to a disk or USB drive. I think there will be no problems with writing to disk; to burn the Kaspersky Rescue Disk 10 image to a USB drive, follow these steps:
1. Connect the USB drive to your computer
Attention!!! To successfully burn Kaspersky Rescue Disk 10, the memory capacity of the USB drive used must be at least 256 MB. The USB drive must be set to FAT16 or FAT32 file system. If the USB storage device is set to NTFS file system, format it to FAT16 or FAT32. To record Kaspersky Rescue Disk 10, do not use a USB drive that already contains another bootable operating system. Otherwise, your computer may not boot from Kaspersky Rescue Disk 10 correctly.
2. Download the Kaspersky Rescue Disk 10 image and the utility for burning to a USB drive
Iso image of Kaspersky Rescue Disk 10 (~250 MB)
Utility for burning Kaspersky Rescue Disk 10 to USB (~378 KB).
3. Burn Kaspersky Rescue Disk 10 to a USB drive
To do this, follow these steps:
Run the rescue2usb.exe file.
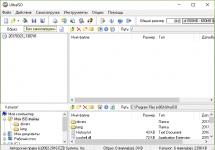
In the Kaspersky USB Rescue Disk Maker window, specify the location of the downloaded Kaspersky Rescue Disk 10 image using the Browse button...
 Select the desired USB storage device from the list.
 Press the "START" button and wait for the recording to complete.
 In the window with information about the successful completion of recording, click “OK”.
  4. Prepare your computer to boot from a USB drive
 Note!!!To load the BIOS menu, use the Delete or F2 keys. For some motherboards, the F1, F8, F10, F11, F12 keys may be used.
Information about how to open the BIOS menu is displayed on the screen when the operating system starts booting:
In the BIOS settings, on the Boot tab, select booting from a Removable Device, that is, from a removable disk (for detailed information, see the documentation for your computer’s motherboard).
Connect the USB drive with the recorded image of Kaspersky Rescue Disk 10 to your computer.
Kaspersky USB Rescue Disk 10 is ready to use. You can boot your computer from it and start checking the system.
5. Boot your computer from the created disk.
Restart your computer. After the reboot, the message Press any key to enter the menu will appear on the screen.  Press any key.
Note!!!If you do not press any key within ten seconds, the computer will automatically boot from the hard drive.
Use the cursor keys to select the GUI language. Press the ENTER key.  Read the Kaspersky Rescue Disk License Agreement. If you agree with his demands, press 1 on your keyboard. To restart, press 2, to turn off the computer, press 3.
Select one of the following boot modes:
Kaspersky Rescue Disk. Graphics mode - loads the graphics subsystem (recommended for most users)
Note!!!If you don't have a mouse connected to your computer (for example, you have a laptop and use a touchpad instead of a mouse), select Text Mode.
Kaspersky Rescue Disk. Text Mode - Loads a text user interface, which is presented by the Midnight Commander console file manager.
Press the Enter key and wait for the system to boot.  After loading the operating system, you can start working with Kaspersky Rescue Disk 10. Update the program's anti-virus databases and run a virus scan using Kaspersky Rescue Disk 10.
1. Boot your computer from Kaspersky Rescue Disk 10 in graphical mode.
2. In the lower left corner of the screen, click on the button shaped like the letter K. From the menu, select Kaspersky Rescue Disk.
3. Update the Kaspersky Rescue Disk anti-virus databases. To do this, on the Update tab, click the Run update button.  4. Wait until the program’s anti-virus databases are updated.
5. On the Object Scan tab, check the boxes next to the objects that the program should scan. By default, Kaspersky Rescue Disk scans boot sectors of hard drives, as well as hidden startup objects of the operating system.
6. Click the Perform object scan button.  7. After the scan is completed, if threats are detected, the program will ask you what action to take on malicious objects:
- Treat. After treatment, you can continue working with the object.
- Place in Quarantine if the scan fails to determine whether the object is infected or not. If you have set the required option to check quarantined files after each database update, then after receiving a new disinfection signature, the object in Quarantine will be disinfected and made available to the user again.
- Delete. If an object has been assigned a virus status, but it cannot be cured, you can delete it. Information about the object will be saved in the report on detected threats.

Checking in text mode.
To run a computer scan and remove malware from your computer, follow these steps:
1. Boot your computer from Kaspersky Rescue Disk 10 in text mode.
2. In the main menu of the loaded Midnight Commander file manager, select the desired type of scan using the arrow pointers and press Enter on the keyboard (or click on the symbol on the keyboard on the left in the Midnight Commander window). 
Kaspersky Lab specialists recommend one by one checking startup objects (to do this, press s on the keyboard), as well as the boot sector (press B on the keyboard).
3. After waiting for the scan to complete, update the Kaspersky Rescue Disk anti-virus databases. To do this, in the main menu of the Midnight Commander file manager, select the Perform update option and press Enter on your keyboard (or just press u on your keyboard).
How to prevent SMS banners from appearing.
To avoid having to deal with SMS banners in the future, you must follow several rules:
1 When you go to pages on the Internet, do not click on pop-up windows on sites, for example “update flash player”, or “check your computer online for viruses”, or “a virus has been detected on your computer - click delete” - all this will most likely lead to infecting your computer with viruses.
2 Be sure to use an antivirus and update the database regularly.
3 Install all updates to the operating system.
Materials used from the site http://support.kaspersky.ru/viruses/rescuedisk/