Before you begin to perform any manipulations with your smartphone, I want to warn you that after updating it, you will lose the opportunity to take advantage of the guaranteed free service from the manufacturer. You are also responsible for the results obtained after performing the actions described in this article.
You should always start flashing your smartphone by searching for and selecting a new operating system. The largest domestic portal 4pda, or foreign xda, will help you in this matter. These resources cooperate directly with developers of unofficial operating systems, and are the first to publish firmware updates and additions. Also, when choosing a new firmware, carefully read the description, paying attention, if any, to the “errors and problems” item. Under the description there are always comments and reviews from people who have already installed this OS; they can contain quite a bit of useful information, primarily about problems that have arisen and methods for eliminating them. I also want to say that before making your choice, decide what result you want to achieve from installing a new operating system. There really aren’t many options; for me, all firmware is divided into three subtypes:
- To improve the performance of your smartphone.
- To change the appearance.
- Firmware for combined use.
This, of course, is a conditional sorting, but after reading the description, you will understand that each OS has its own unique characteristics, since each developer sees the improvement of the official firmware in his own way. Below is a short list of popular firmware for the htc desire x smartphone.
- "MIUI v5". Excellent firmware, the creation of which focused on changing the standard Sense graphics. Among the main advantages of this version of the operating system described by the developer, I would like to highlight the rather low battery consumption, improved multitasking, despite the fact that it was not possible to increase the amount of free RAM, and improved sound quality in the main speakers. Of the minuses, I would note a very long update of multimedia libraries, and minor problems with the camera’s autofocus, which are eliminated by installing a camera from a third-party developer. It is also worth saying that, like all MIUI firmware, it has its own store with themes, lock screens and other decorations, most of which are available for installation for free, smooth animation, and the complete removal of all Sense graphics.
- "SuperSENSE-dx5". Not a bad firmware, which is more suitable for combined use. The developer focused on improving the multitasking of this system, performed optimizations to save more battery, worked with the animation, which has now become smoother, and when using 3D graphics, micro-freezes have disappeared. As for the graphics, nothing has been cut down or removed, several new themes and non-standard launchers have been added, but otherwise the official Sense 5 shell remains.
- "Sprite ROM Hybrid". In this firmware, the main changes affected the system performance and battery life of the device. All programs open quickly, the graphics are smooth, and there are no more microfreezes in games. The developer of this firmware made a good selection of pre-installed applications, almost completely replacing all the standard applications with them, installed several good tweaks for more stable operation of the wireless Internet network, and installed “Viper4android” with a large selection of settings to suit your taste, which is now directly connected to the player. The result is perhaps the fastest operating system for the HTC Desire X smartphone.
Yes, a little off topic, but the other day I flashed my already quite old smartphone and have some experience. As they say, the same firmware has something in common with satellite receivers.
I hope with this post I will help someone and reduce the time spent, since there is a lot of information, but most of it is very scattered. Further myself HTC Desire A8181 phone firmware process on Android version 4 or higher.
To start. Many people write that you need to unlock the bootloader - I never succeeded, nor with the program HTC Bootloader Unlock, nor the standard method through the office. htc website.
Instructions for flashing HTC Desire phone firmware on Android 4+
As it turned out, I had the latest official update with Android version 2.3. Accordingly, S-ON is software change protection. Which first needs to be removed.
But before you do anything, you need to install the drivers for your device on your computer, twice.
This must be done in semi-automatic mode, each time pointing to the folder with drivers.
First HTC+Drivers are needed when the phone is working normally, and the second Android USB Driver– when working with the bootloader and in recovery mode.
According to the instructions. Personally, I uploaded the archives to the root of drive C and installed them from there, or rather indicated where they were located.

So the drivers are installed and the phone is visible on the computer, let's move on.

As already mentioned, you need to remove S-ON to become S-OFF. You can view the status like this. Turn off the phone - take out the battery and press volume down + turn on.

You can see it at the very top.
How to remove S-OFF htc?
More precisely, how I did it. Go to the website http://rev.alpharev.nl/ - download the application for Windows there. Fill in the data here. We take the serial number from our phone - look for it in the settings or look under the battery.

Please enter according to register. We generate and receive the code which we enter into the running application from there. The phone must be connected by cable.
After which you should get S-OFF and the inscription in pink.

The next step is to sew a recovery to an alternative one. We will need an archive Android– which we unzip to the root of drive C.
There is Recovery Flash.bat and recovery.img (recovery-clockwork-touch-5.8.0.2-bravo.img). When you start the first one, the second one should be flashed. I chose this version of recovery because it seemed convenient to me, it worked adequately and the controls are familiar - with your finger. You can look for an alternative and just rename it to recovery.img and sew it the same way.
Next you need to get super user rights. The program worked for me Kingo ROOT from under Windows with the phone normally turned on via cable.
All this allowed me to flash the phone with custom firmware. Of course, the first one I found didn’t suit me, and the second one didn’t install well either. In short, I settled on this CM10.1_VJ_4.2.2_V6.2_Sense_Data++.zip . With increased space for programs on an external flash drive.
Don’t think that everything is just about firmware – that is, installing software. It still needs to be configured. So it's almost a bare system.
The instructions at the address helped me a lot
http://4pda.ru/forum/index.php?showtopic=366523&st=7220#entry39335246
But you shouldn't trust her completely. Look for yourself what you need more.
I didn’t delete Google services and updates - I just turned them off and this immediately gave me a lot of space for the necessary programs.
I thought it necessary to install LowSoundFixer_v1.0.8.apk(increases volume - firmware bug) and SD+Maid+Pro+v3.1.4.6_arm-zipalign(cleans cache and garbage on the phone). But the rest is not.
pic phone screen
Conclusion - the phone works perfectly and is configured for modern Android. Now you can install the necessary applications that did not work on the old version, and there is also a lot of space for games and programs. Definitely need to sew.
Video firmware htc desire a8181 android 4
HTC Desire 516 Dual Sim is a smartphone that, like many other Android devices, can be flashed in several ways. Reinstalling system software is a need that does not arise very rarely for owners of the model in question. Such manipulations, if performed correctly and successfully, allow you to somewhat “refresh” the device in software terms, as well as restore functionality lost as a result of failures and errors.
The success of stitching procedures is determined by the correct preparation of tools and files that will be needed during the work process, as well as strict adherence to instructions. In addition, do not forget the following:
Responsibility for the result of manipulations with the device lies solely with the user who carries them out. All the actions described below are performed by the smartphone owner at his own peril and risk!
Preparatory procedures preceding the actual process of transferring files to device partitions can take quite a long time, but it is highly recommended to carry them out in advance. Especially in the case of the HTC Desire 516 Dual Sim - the model quite often creates problems for its users in the process of manipulating the system software.
Drivers
Installing drivers for pairing the device and software tools for firmware is usually not difficult. You just need to follow the instructions for Qualcomm devices from the article:

Just in case, an archive with drivers for manual installation is always available for download at the following link:
Backup
Due to the possible need to restore the smartphone software, as well as the mandatory deletion of user data from the device during the software installation process, you need to save all valuable information contained in the phone’s memory in a safe place. And it is also highly recommended to create a backup of all partitions using . Instructions can be found in the material at the link:

Since several software installation methods are applicable to the device in question, which differ quite significantly from each other, links to downloading the necessary programs and files will be posted in the description of the methods. Before proceeding directly with the instructions, it is recommended that you familiarize yourself with all the steps that will have to be carried out, as well as download all the necessary files.

Firmware
Depending on the state of the device, as well as the goals set by the user performing the firmware, the method of carrying out the procedure is selected. The methods described below are arranged in order from simple to more complex.
Method 1: MicroSD + Factory Recovery Environment
The first method by which you can try to install Android on HTC Desire 516 is to use the capabilities of the “native” recovery environment provided by the manufacturer. This method is considered official, which means it is relatively safe and easy to implement. You can download the software package for installation according to the instructions below using the link:
As a result of completing the steps below, we get a smartphone with the official firmware installed, intended for the European region version.
There is no Russian language in the package! The Russification of the interface will be discussed in the additional step of the instructions below.

Additionally: Russification
To Russify the European version of the OS, you can use the Android application Morelocale 2. The program is available on Google Play.


Method 2: ADB Run

The result of following the instructions below will be a smartphone with the official firmware version 1.10.708.001 (the latest available for the model) containing the Russian language. You can download the archive with the firmware from the link:
- Download and unpack the archive with the firmware.
- The folder obtained as a result of unpacking contains a multi-volume archive containing the most important image for installation - "System". It also needs to be extracted into the directory with the rest of the image files.
- Install ADB Run.
- Open in Explorer the directory with ADB Run, which is located along the path C:/adb, and then go to the folder "img".
- Copying files boot.img, system.img, recovery.img, obtained as a result of unpacking the firmware, into folders with appropriate names contained in the directory C:/adb/img/ (that is, the file boot.img- to the folder C:\adb\img\boot and so on).
- Writing the three above file images to the corresponding sections of the HTC Desire 516 flash memory can be considered a full installation of the system. In normal cases, it is not necessary to install the remaining image files, but if there is such a need, copy them to the C:\adb\img\all folder.
- Enable USB debugging and connect the device to the PC.
- We launch Adb Run and use it to reboot the device into mode "Fastboot". To do this, first select point 4 "Reboot Devices" in the main menu of the application,

and then enter the number 3 from the keyboard - item "Reboot Bootloader". Click "Enter".
- The smartphone will reboot to the state "Download", what does the loading screensaver frozen on the screen indicate? "HTC" on a white background.
- In ADB Run, press any key, and then return to the main menu of the program - item "10 – Back to Menu".

Choose "5-Fastboot".

- The next window is a menu for selecting a memory partition into which the image file will be transferred from the corresponding folder in the C:\adb\img directory.

- Optional but recommended procedure. We clean the partitions that we are going to write, as well as the partition "Data". Choose "e - Clear Partitions (erase)".

And then, one by one, we go to the points corresponding to the names of the sections:


"Modem" And "Splash1" NO NEED to wash!
- We return to the image selection menu and write down the sections.


And "System" to HTC Desire 516 memory.

Image "System" in essence, it is the Android OS, which is installed in the device in question. This section is the largest in volume and therefore its rewriting takes quite a long time. The process cannot be interrupted!

And wait for the process to complete.

This will lead to the smartphone rebooting, a long startup time, and eventually the HTC Desire 516 initial setup screen will appear.

Method 3: Fastboot
If the method of flashing each partition of the HTC Desire 516 memory separately seems too complicated or time-consuming, you can use one of the Fastboot commands, which allows you to write the main part of the system without, in some cases, unnecessary actions on the part of the user.


fastboot devices

The system response should be the serial number 0123456789ABCDEF and the inscription "fastboot".


fastboot flash partition name image file name.img
For example, let's write the section "modem". By the way, for the device in question, writing the “modem” section is a procedure that may be necessary after restoring the smartphone from a non-working state, if as a result the smartphone works as it should, but there is no connection.
Copy the required image(s) to the directory with Fastboot (1) and send the command(s) (2):
fastboot flash modem modem.img


Method 4: Custom firmware
The HTC Desire 516 model has not gained wide popularity due to its hardware and software features, so, unfortunately, it is impossible to say that there are many modified firmware for the device.

One of the ways to transform and refresh the device in question in software terms is to install an Android shell modified by one of the users of the device, called Lolifox. You can download all the necessary files that you will need when performing the steps in the instructions below using the links below.
In the proposed solution, its author has done serious work in terms of changing the OS interface (looks like Android 5.0), deodexed the firmware, removed unnecessary applications from HTC and Google, and also added an item to the settings that allows you to control startup applications. In general, the custom works quickly and stably.
Installing custom recovery.
To install a modified OS, you will need custom recovery capabilities. We will use it, although there is also a port for the device that you can download. In general, installation in D516 and work with different custom recoveries are similar.


Installing custom Lolifox
Once the modified recovery is installed in the HTC Desire 516, installing custom software is not difficult. It is enough to follow the instructions from the lesson at the link below, which involve installing zip packages.
Let us dwell only on a few points recommended for implementation for the model under consideration.


Method 5: Recovering inoperative HTC Desire 516
When operating and flashing any Android device, trouble can occur - as a result of various failures and errors, the device freezes at a certain stage, stops turning on, endlessly reboots, etc. Among users, the device in this state was called “brick”. The following may be a way out of the situation.
The recovery methodology (“unscrapping”) of HTC Desire 516 Dual Sim involves performing quite a large number of actions and using several tools. We carefully follow the following instructions step by step.
Switching the smartphone to “Qualcomm HS-USB QDLoader9008” mode
- Download and unpack the archive with all the necessary files and tools for recovery.
The result of unpacking should be the following:
- To restore, you need to put the smartphone into a special emergency mode QDLoader 9006. Remove the cover covering the battery.
- We remove the battery, SIM cards and memory card. Then unscrew 11 screws:
- Carefully remove the part of the case covering the motherboard of the device.
- On the motherboard we find two contacts marked "GND" And "DP". Subsequently, they will need to be bridged before connecting the device to the PC.
- We install the QPST software package from the folder of the same name, obtained as a result of unpacking the archive using the link above.
- Go to the directory with QPST (C:\Program Files\Qualcomm\QPST\bin\) and run the file QPSTConfig.exe
- Opening "Device Manager", prepare a cable connected to the USB port of the PC. Closing the contacts "GND" And "DP" on the D516 motherboard and, without opening them, insert the cable into the MicroUSB connector of the phone.
- Remove the jumper and look out the window "Device Manager". If everything is done correctly, the device will be detected as "Qualcomm HS-USB QDLoader9008."
- Go to QPSTConfig and make sure that the device is detected correctly, as in the screenshot below. Don't close QPSTConfig!
- Open the folder with the QPST files again and run the file emmcswdownload.exe on behalf of the Administrator.
- Add the following files to the fields of the window that opens:

- We press the buttons and indicate to the program the location of the files:

- We check that all fields are filled in correctly (should be like in the screenshot below) and click "Download".
- As a result of the operation, HTC Desire 516 Dual Sim will be switched to a mode that is suitable for writing a dump to memory. In Device Manager, the device should be identified as . If, after manipulations via QPST, the device is determined to be somehow different, manually install the drivers from the folder "Qualcomm_USB_Drivers_Windows".


Additionally
In the event that errors occur during QPST operation and the smartphone switches to "Qualcomm HS-USB Diagnostics9006" We can’t do it, we try to perform this manipulation through the MiFlash program. You can download the firmware version suitable for manipulating HTC Desire 516 Dual Sim, as well as the necessary files, from the link:
- Unpack the archive and install MiFlash.
- We follow steps 8-9 described above in the instructions, that is, we connect the device to the computer in a state where it is detected in Device Manager as "Qualcomm HS-USB QDLoader9008".
- Launch MiFlash.
- Press the button "Browse" in the program and indicate the path to the directory "files_for_miflash", located in the folder obtained as a result of unpacking the archive downloaded from the link above.
- Click "Refresh", which will lead to the device being detected by the program.
- Calling up the list of button options "Browse" by clicking on the triangle image next to the last one

and selecting from the menu that opens "Advanced...".
- In the window "Advanced" using buttons "Browse" add files from the folder to the fields "files_for_miflash" in the following way:

After all files have been added, click "OK".
- Next, you will need to be careful. Making the window visible "Device Manager".
- Press the button "Flash" in the flasher and observe the COM ports section in "Dispatcher".
- Immediately after the moment when the smartphone is detected as "Qualcomm HS-USB Diagnostics9006", we close MiFlash without waiting for the end of the manipulations in the program, and move on to the next stage of restoring HTC Desire 516.


File system recovery

Thus, having studied how to install system software in the HTC Desire 516 Dual Sim, the user gains full control over the device and can quite easily restore the device’s functionality if necessary, as well as give the smartphone a “second life” using customization.
The HTC Desire communicator has appeared in the vastness of Russia. And along with it, many different firmwares appeared, both native and alternative. “Grey” devices that are tied to some operator also began to be imported into the country. Due to this firmwareHTCHTCDesire raises many questions for many.
I would like to note right away that if we compare the procedure related to how to flash an Acer neoTouch or another device on WinMo, in our case there are significant differences. And they start with the fact that we are dealing with a device built on Google Android.
So let's get started. If you have a device that is fully certified for Russia, then you have two options. Flash using Wi-Fi, through the “Phone Settings” menu, then “About Phone”, then “Update Phone”. The device will connect to the update server and download the firmware. The main thing is that the Wi-Fi connection is free. Or you can download the corresponding executable file from the company’s website, run it on a Windows computer and follow the instructions completely. There are no problems here, everything is similar to the procedures for standard WinMo firmware. But what if you need to flash non-standard firmware?! You need to do the following.
Custom firmware for HTC Desire - instructions
In order to firmwareHTCHTCDesire started, you need to determine the bootloader version. For this purpose, we simultaneously press two buttons: “Back” and “Shutdown”, the boot menu appears on the screen, in which in the second line we are interested in information of the form: HBOOT - 0.xx.0000, where xx is the bootloader version. For version 0.75 you need to download this kit, and for version 0.80 - this one.
Then we begin the process itself. We write the file "update.zip" to the flash card. We'll also add the firmware there. We also unpack the required kit there, depending on the bootloader version. Launch the console in this folder. Turn off the communicator and turn it on in Fastboot mode (to do this, press “Back” and “Shutdown”). You will see the words FastBoot enclosed in a red square. Connect the USB cable to the communicator. In the terminal, depending on the system, enter: for Windows step1-windows.bat, for MAC - ./step1-mac.sh, for Linux - ./step1-linux.sh.
An error message appears, do not pay attention. We are waiting for the first step to complete.
As soon as this happens, we transfer HTC Desire to Recovery mode. To do this, go to BootLoader, and from there to Recovery. For this purpose we use “Up”, “Down” and “Off”. Press “+Volume” and “Power” and go to the blue Recovery mode. In this menu, select the Apply sdcard: update.zip item and go to a new window. By the way, now the USB cable can be disconnected. Click on Wipe Data and confirm deleting the data. When finished, select install.zip from SDCard and specify our zip file. Confirm by pressing the trackball. FirmwareHTCHTCDesire has begun. When finished, reboot the device.
For those who want to make a copy of the data, you need to select the nandroid - backup item before deleting the data, and then select restore - nandroid before the final reboot.
As you can see, if desired, this procedure is available to anyone. But still, if you are not confident in your abilities, I would not recommend carrying out this procedure yourself, but turning to specialists.
And in conclusion I would like to note that, firmwareHTCHTCDesire carried out in this way will allow you to install any update, firmware, radio module, etc. on the device.
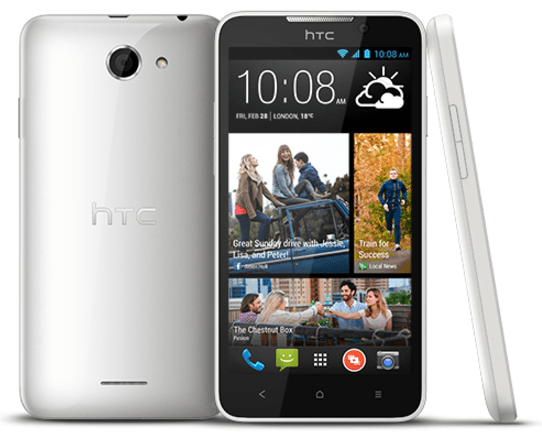
Most owners of ultra-fashionable smartphones or HTC smartphone model desire c on the Android 4.0 operating system with a color screen, 16.78 million colors - 320x480 dpi believe that it is impossible to independently change the firmware in these gadgets, but they are deeply mistaken.
The reasons why you need to flash a phone, HTC smartphone model desire c on the Android 4.0 operating system with a color screen, 16.78 million colors - 320x480 dpi, are very diverse: when the device completely refuses to turn on, if it spontaneously starts to reboot, you need to restore the software after an unsuccessful installation or just wanted to install the latest firmware version.
Firmware Flashing of smartphones HTC one a9, 626, desire 816 and other models.
- You can do the firmware yourself on all phones, HTC smartphone model desire c on the Android 4.0 operating system with a color screen, 16.78 million colors - 320x480 dpi.In addition to the topic of firmware on Android smartphones, there is a review article: . It describes in detail, there is a video instruction on how to reflash a mobile device to Android kit kat.
In what cases should you update the firmware of smartphones, HTC smartphone model desire c on the Android 4.0 operating system with a color screen, 16.78 million colors - 320x480 dpi and for other models:
If the phone does not turn on, although the reason may not be in the firmware;
If the phone constantly glitches and reboots;
If the firmware is unsuccessful and the phone needs to be returned to its original state;
If you need to install the latest, most modern firmware version;
Download firmwares, programs, flashers and firmware for HTC.
Download free firmware for HTC phone from your computer.
- the official website of the manufacturer of cell phones HTC, for the following models 626, desire 816, desire 300 and others. By clicking on the link, you can enter the name and model code into the search and download software and firmware, for example for HTC 626, desire 816, desire 300, where you can also download RU, RP, software and driver for free on your mobile device.The search for software, first of all, should always be carried out on the official website of the electronics manufacturer; there are always the most current and latest firmwares for the HTC one m7 phone with a Super LCD 3 color screen, touch dpi and other models with other characteristics.
Instructions for HTC firmware.
How to properly flash a smartphone. Instructions for firmware using the example of HTC one m8, one m7.
On your smartphone, go to Settings->Developer options and enable USB debugging.
We connect the USB cable from the phone to the computer and install the firmware.
Disconnect the phone from the computer, turn it off and remove the battery.
We launch the SP Flash Tool program on the computer, it is needed to upload new firmware to the phone.
In the program window, click the Scatter-loading button and in the window that opens, select the file MT6589_Android_scatter_emmc.txt (you can find it in the folder with other files of the new firmware). After opening, the program will contain all the paths to the files necessary for the update.
Be sure to uncheck the first item - PRELOADER (otherwise the phone will not boot).
Now click the Download button. We answer “Yes” to any pop-up messages.
We connect the smartphone (using a USB cable) to the computer, the new firmware will begin to be uploaded to our device automatically.
When the process is complete, a window with a green circle will appear. You can disconnect your phone from your PC and turn it on.
For more information on how to do this, see the video instructions:
To search for firmware on the Internet, you need to know the model of your phone that you will be flashing. You can quickly find out your phone model and firmware version by typing the code in your phone *#0000# .
Instructions for flashing HTC one m8, one m7
One more example. Instructions for flashing firmware for HTC one m8, one m7 mobile phones.
Firmware for HTC one m8, one m7: download firmware for
Firmware for HTC one m8, one m7