Hello friends. This article will discuss a fairly simple and necessary procedure for installing a photo on your desktop.
The blog recently added a “feedback” section, through which you can contact me and suggest a topic for an article that you would like to see. Today I am publishing an article specifically at the request of my reader who contacted me through this method and asked me to write an article on how to put a photo on a screensaver.
The first thing we see after loading the OS (operating system) is the desktop, so everyone wants to put a background picture. This procedure is carried out in several ways in all operating systems. Today we will look at the example of installing a desktop background running Windows XP; many more use it on their computers, since the hardware of newer systems does not “pull”, also using the example of OS 7 and Windows 10.
A little earlier, a friend asked me to write an article on this topic, thanks to him I wrote various articles before that. This time I won’t refuse either.
A photo or picture is installed on the desktop under the guidance of Windows XP in at least two ways:
First way:
*Right-click (RMB) on any free space on the desktop and select “PROPERTIES”
*The “Display Properties” window will open. Go to the “Desktop” tab
*Locate the “Background image” field. It already has different default pictures.
*Having selected the one you like from the list, you can set its location on the screen in the corresponding “drop-down” menu.
What to do if you want to put your own or downloaded image? In this case everything is very simple. Open the picture or photo that you want to see on the screensaver, and right-click anywhere on it and select “Set as desktop background.”
The same procedure under Windows 7 is carried out a little differently:
*RMB on the desktop and select “Personalization”
*In the window that opens, you can select a default theme.
By choosing a theme, you change the background image, window color, sounds and screen saver.
Also, when you select a theme, the backgrounds change to those that are part of it.
*If you want to select a permanent desktop background, then below the themes area there is a “Desktop Background” menu.
*By going to this menu, we are given the opportunity to select a background image. Click on the “Browse” button in the “Image Location” field and select the path to the picture, then click “Save Changes”.
*If you specify an entire folder with selected photographs (drawings), then all of them will change at a specified time interval.
*In addition to selecting the time for changing the image in the “Change image every” drop-down menu, there is, just like in Windows XP, an “Image Position” menu.
The method for installing your photo on the screensaver in Windows 10 is also simple:
*There is “personalization” here too. We select it in the same way as in Windows 7: right-click anywhere on the desktop and find the desired item.
*In the window that opens, select “Background” on the left.
*On the right side of the window, from the drop-down list, choose at your discretion what to use: photo, solid color or slide show.
*When selecting “photos”, we are offered some of them by default, or you can use the “Browse” button to set the path to the desired photo.
*When viewing a picture on a PC using the standard “Photos”
This OS makes it possible to widely use the viewed photos. The control menu is shown in the screenshot below:
*You can “Share” the picture on social media. networks if you have access to the Internet.
*If there are more pictures (pictures) in the folder with the open photo, you can view them as a “slide show” by clicking on the corresponding icon.
*We are also given the opportunity to make changes using the standard editor in OS 10.
*Do you want to rotate the image? No problem. Click on the “rotate” icon.
*And not without the necessary “delete” function.
*In the right corner of the “manage” menu for the element being viewed there is an icon in the form of three dots. Click on it and you will be given several more options for managing it. We see them in the screenshot below:
Since we are considering the topic of how to put a photo on a screensaver, we are interested in the “set as” item. After clicking on it, we choose how we will use this photo. From the proposed options, namely, “Set to lock screen”, “Set as background image”, “Set to Photo icon”, select the second one.
After selecting, we watch the process of installing the background for a few seconds and can observe the picture we have selected as the desktop background.
After reading this article, I think many people were interested in how in one day I was able to consider how to carry out this operation on three different operating systems. The answer is very simple. I have two virtual machines installed on my work computer on which I installed Windows XP and 10 for such purposes. Want to learn more about the virtual machine? Read.
For subscribers of the free blog newsletter, this is not a secret at all, because they receive all the latest articles immediately after they are published. I recommend that you subscribe and always be aware of all the blog news, especially since I publish educational articles. In most cases, topics for them are suggested to me by subscribers who are eager to learn something new in the computer field.
This concludes our meeting today. Thank you all for your attention.
Lesson 18 Setting up Windows 8
There are two options for customizing Windows 8 settings. First, you can use Settings mode, which is used primarily for touchpads. To call this mode, move the mouse cursor to the upper right corner of the screen and select the charm button from the buttons that appear Search . Enter the word in the top field Options and click on the inscription below Options .
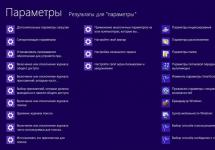
A window with different parameters will appear on the screen.

Let's click on any inscription and a window with different modes and parameters will appear on the screen, as shown below. On the left are the names of the sections, and on the right are the parameters that relate to the selected section.

There is also a control panel mode. In order to call it, you can go to the list of programs, for which in the initial screen, right-click on an unoccupied part of the screen, click on the button that appears All applications , which is located at the bottom right of the screen, move the list of programs, find the Control Panel icon and double-click on the icon with the left mouse button. The mode window will appear on the screen.

If you see a window with different content, then click on the icon Small icons and in the panel that appears, select the mode category .

There are several particularly frequently performed modes, which we will consider further. For
Placing a picture on the desktop (wallpaper).
Select the mode in the control panel -Design and personalization.

Then select the mode Changing your desktop background In chapter Personalization, that is, click on this inscription with the left mouse button.

In the main window fieldThere are standard types of pictures on the desktop. As you can see, there is a picture that appears after installation Windows(there is a check mark at the top right of the picture). You can select a picture from those presented on the screen by clicking on it. The selected pattern will appear on the screen. To specify a different source of photos, click on the buttonWindows Desktop Backgrounds.

If the user has his own photos that need to be placed on the desktop, then you can use the Review , find the desired folder and select a photo.
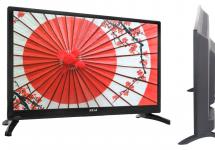
You can also set the appearance of the drawing on the screen. There is a button at the bottom of the window filling , if you click on it, a panel with modes will appear, as shown in the figure: in the first one, the image is stretched to fill the entire screen.

In this case, the vertical and horizontal dimensions increase proportionally, and the unnecessary part of the picture is cut off ( Filling); in the second, the drawing is positioned according to its size. If the picture is smaller than the screen, black bars will appear ( To size); however, you can stretch the drawing to fit the window. In this case, the vertical and horizontal dimensions may not be proportionally increased ( Stretch); or stretch it like wallpaper, that is, several identical patterns will appear horizontally and several vertically ( Pave), in the latter, the drawing will not be stretched and will be shown as it is. In this case, black fields may be around the picture ( Centered).
Setting the screen resolution.
Let's choose a mode Control Panel→ Screen → Setting the screen resolution.

There is a field in the window Permission screen that contains a slider that changes the size of the image displayed on the screen in pixels. As you can see, the resolution is set to 1280 by 800. If you click on the () button, a resolution scale will appear, as shown in the figure.

This is the maximum resolution, since the slider is located at the very top of the indicator. This means that the resolution can only be reduced. Let's move the slider down. There are several possible values, let's settle on 1024 by 768. Click on the button OK .
There will be a transition to the new resolution. A confirmation window will appear on the screen. If we are satisfied with the new resolution, then click on the buttonSave changesand the new resolution will be installed. If we press the buttoncancel changes, then it will return to the previous resolution.
Screensaver (screensavers).
The first computers used cathode ray monitors, the screen of which was coated with a phosphor. Over time, the phosphor faded and a picture remained on it, which was most often displayed on the screen. Since the most common program was Norton Commander, even when the display was turned off, the image of its window remained. To avoid this, the system Windows screensavers were turned on, that is, a mode in which after a certain time the screen went dark and a dynamic picture appeared, for example, an inscription moved across the screen or a geometric figure rotated. Now screensavers are not relevant, but, nevertheless, they continue to be used to make the screen look more attractive when taking a break from work.
Let's choose a mode Control Panel→P personalization (Changing the screensaver).

After installing Windows 8 there is no splash screen. The screen saver type can be selected in the field Screensaver , to do this you need to click on the check mark, point down () in this field and a panel will appear, the appearance of which is shown below.

Let's choose a mode Geometric Waltz, which will appear in a window on the display screen. You can change the inactivity time (the time during which there was no user access to the keyboard or mouse), after which the splash screen appears, in the window Interval.

Some types of screensavers can be changed using the mode Options . You can select a different type of screensaver, and also set the time when the screensaver will appear if you are not working with the mouse and keyboard. If you press the button View , then the screensaver will appear on the entire screen for a few seconds.
Installation and removal of programms.
Installing programs is quite simple. Open the Explorer program (that is, launch it). Find the program's installation file, which often has the words setup or install in its name and has an exe extension. If the program is not yet installed, search it on the Internet and download it to your computer. Double click on the program file icon and it will start executing. As a rule, for a standard installation you should press the button Next or Install . Sometimes programs require you to agree to license terms, in which case click the type radio button I agree to the license terms, or sometimes you need to click on the window with the text of the license agreement and scroll to the end (but this happens very rarely). At the end a button will appear Ready . You can learn how programs are installed in the second part of the site - Tutorial for free programs.
To remove programs, you must enter the modeControl Panel→ Programs (Uninstall a program).

Let's select the program that needs to be removed, for example, 7-Zip, by clicking on its name.

Click on the button that appears Delete , which is located at the top of the screen.

A request will appear in which we confirm the need to remove the program by clicking on the button Uninstall . The program will begin uninstalling. You may be prompted to restart your computer. If we set the switch Reboot now, then the computer will immediately begin closing all programs and reboot.
After deletion, the program name will disappear from the list of programs.
Please note that after uninstalling the program, the amount of occupied space on your hard drive will be greater than before installing the program. The fact is that some of the modules that were loaded into the Windows system libraries are not deleted, since it is possible that the same modules are used by other programs. Therefore, installing a lot of programs and then uninstalling them will fill up your hard drive more and more and can cause your computer to slow down over time. In this case, only reinstalling the system can help. Windows. Therefore, if a program is not needed, then you should not install it; have only those programs that you will use constantly.
Installing and disabling devices.
Devices that connect to the USB connector can be connected to a running computer. Other devices should be connected when the computer is turned off, as problems with the motherboard may occur.
When you connect a device, for example, a keyboard (but not with a PS/2 connector) or a mouse (but not with a PS/2 connector) or a flash drive, the operating system will detect the presence of a new device, select a standard driver for it, and you can work with the device. If the device requires its own driver, the Found New Hardware Wizard window will appear on the screen. We have already looked at connecting a printer. Since the installation is similar, we will not describe this process.
You can painlessly disconnect devices that do not have a clipboard, for example, a flash drive, mouse, keyboard, connected to the socket USB . To disconnect external hard drives, you must either turn off your computer or select the Safely Disable Devices mode, which is located at the bottom right of the screen.
To disconnect an external drive connected to the connector USB , you need to click on the triangle, which is located at the bottom right of the screen (). And in the panel that appears, select safe disconnection of devices ().

A panel will appear on the screen with devices that can be disabled.

Click on the desired name, for example, extract “ Samsung M2 Portable” , that is, an external drive. After the mode has started, a message will appear on the screen indicating that the device can be turned off.

Autorun programs.
Sometimes it is required that when you turn on the computer, some program is loaded, for example, a browser for surfing the Internet Internet Explorer. A list of programs that perform autoloading can be found in Task Manager, which was discussed earlier. To call Task Manager, right-click on the free space of the bottom line and select mode Task Manager. Then let's go to the tab.

If you right-click on the program name, a panel with modes will appear. If you select the mode Delete , then the program will be removed from startup and will not load when the computer is turned on. It can be launched from the all applications panel, desktop and other places.
The article describes how to set wallpaper on your desktop computer or laptop.
Owners of different versions of operating systems (“ Windows 10», « Windows 8», « Windows 7», « Windows 8.1") when installing them on a computer or laptop, they want to achieve not only convenient work with them, but also a beautiful design. It is very pleasant to work on computers when the design and decoration of windows, wallpapers, icons, etc. look elegant and stylish.
In this review we will talk about how on laptops and computers running " Windows 10», « Windows 8», « Windows 7», « Windows 8.1“You should change the wallpaper and screensaver on your desktop. One instruction is suitable for all these operating systems, between which there are no fundamental differences in terms of solving this issue.
How to change the desktop wallpaper and screensaver on computers and laptops running Windows 10, Windows 8, Windows 7, Windows 8.1?
To change the wallpaper on your computer or laptop desktop, follow these steps:
- Right-click on an empty space on your desktop and in the menu that opens, click on “ Personalization».

How to change the screensaver on the desktop of a computer or laptop How to change the wallpaper on the desktop of a computer or laptop
- A window will open in front of you in which you can change the wallpaper, screensaver, and theme. The screenshot shows the default themes and user installed themes. The theme is the design of windows and toolbars combined with wallpaper.

How to change the screensaver on the desktop of a computer or laptop How to change the wallpaper on the desktop of a computer or laptop
- Here you can change the color of the window. Click on the appropriate option below

How to change the screensaver on the desktop of a computer or laptop How to change the wallpaper on the desktop of a computer or laptop
- And then you can set the window color using the suggested templates (in the red frame in the screenshot) or yourself by moving the slider left and right (indicated by the red arrow).

How to change the screensaver on the desktop of a computer or laptop How to change the wallpaper on the desktop of a computer or laptop
- So, to change the wallpaper, click on the option below “ For Desktop»

How to change the screensaver on the desktop of a computer or laptop How to change the wallpaper on the desktop of a computer or laptop
- Next we will find ourselves in the folder where all the default wallpapers are stored (you can also open the path to the folder with your personal wallpapers through Explorer). Here you can select one photo, or several, or all. In the last two cases, the wallpaper will change on the desktop after a specified period of time, but this will eat up a lot of RAM, so we recommend unchecking the “ In random order"and select one photo you like by checking the box on it, as shown in the picture. At the bottom left, you can open a menu to choose how your wallpaper will look on your desktop: centered, full screen, etc. Select the wallpaper and click on “ Save changes».

How to change the screensaver on the desktop of a computer or laptop How to change the wallpaper on the desktop of a computer or laptop
- Next, let's change the screensaver. Let's go back to " Personalization" and at the bottom right click on the option " Screensaver».

How to change the screensaver on the desktop of a computer or laptop How to change the wallpaper on the desktop of a computer or laptop
- A window will open through which you can configure the screensaver. Here we can select the screensaver option, as well as the time interval after which it will be displayed on the desktop when you are inactive.

How to change the screensaver on the desktop of a computer or laptop How to change the wallpaper on the desktop of a computer or laptop
- Select the screensaver and click on “ View"to preview what this screensaver will look like.

How to change the screensaver on the desktop of a computer or laptop How to change the wallpaper on the desktop of a computer or laptop

How to change the screensaver on the desktop of a computer or laptop How to change the wallpaper on the desktop of a computer or laptop
- If we liked the screensaver, then click on “ OK"and complete our actions

How to change the screensaver on the desktop of a computer or laptop How to change the wallpaper on the desktop of a computer or laptop
In this simple and standard way you can set wallpaper and screensaver on your desktop.
Video: How to change the screensaver (wallpaper) on your computer screen on your desktop?
Personal computers have become very popular today, which has led to their widespread use. There are several ways to stand out among the owners of such devices, among which one of the most popular is to install an original picture on your desktop.
Today you can find such pictures quite easily on the Internet. When choosing wallpapers for your desktop on https://7fon.ru/, you should first of all pay attention to their resolution in order to choose the best option for your display.
Using the personalization menu
Let's look at the algorithm for setting a background image on the desktop in the Windows 7 operating system. This can be done by following several sequential steps:
- Initially, you should go to the image management menu. To do this, right-click on the desktop and find the “Personalization” menu item.
- In the menu that opens below, find the “Desktop Background” button and click on it.
- After this, a special window will appear with preset images for the desktop. To select any of them, check the box and click the “Save Changes” button.
If you want to install your original image, then you need to use the “Browse” menu, which allows you to specify the path to the image on your computer, and then simply save the changes.

Alternative way
There is another way to change your desktop picture. This algorithm consists of several simple steps:
- Initially, you should find the picture that you plan to use as a background and save it in a convenient place for you.
- After that, go to the folder with the desired image, and by right-clicking on it, select “Set as desktop background.” After this, the picture will become the main image on your screen.
You can do the same with a previously opened picture in one of the viewing editors. All actions are similar to those previously described.
Please note that changing the desktop image is not always supported by some versions of operating systems. This problem can be solved using special utilities that are easy to find on the Internet, where their use is described in detail.
If you have a relatively powerful computer, an alternative to a regular picture can be live wallpapers, which are also easy to download on special sites.
How to change the background image in Windows How to set a screensaver on your computer screen?
Display Properties - Replacing the Desktop Wallpaper
If you work a lot on the computer, then over time you may get tired of the monotonous background image and you will want to replace it with something more original. Plus, changing your wallpaper will show other employees that you happen to be computer savvy!
How to change the wallpaper in Windows 7
By clicking the right mouse button (the cursor should be on a clean desktop, and not on any tabs or shortcuts), call up the context menu.
In the menu that opens, select Personalization
In the window that opens, you can select a background from several dozen pictures that are available by default in the Windows 7 operating system. To view, click on the thumbnails of the pictures and they appear on the monitor screen before your eyes. When you select a picture, click the Save Changes button so that the picture you like becomes your desktop background.
If you check several images, then the field will become active Change image every and from the drop-down list you can select the time interval after which the images will replace each other.
But perhaps you want to make your drawing or photograph your desktop background. Then click the Browse A button and find the folder with your photos. Just keep in mind that if the photo or drawing does not fit the screen size, then you need to click the Fill B button and from the drop-down list select what you need to do with the drawing: stretch it, place it in the center, etc.
It is better to make a photo in advance that matches the size of your monitor screen, otherwise it will be cropped or distorted. See how to make a photo of the desired size using Photoshop.
Changing your desktop background in Windows XP
By right-clicking on a blank screen, you open the context menu. In it, select the bottom line - Properties.
In the Properties: Display window that opens, click the tab Desktop:
This is where you can set the color or background image of the screen.
If you want your monitor screen to be one color, then on the Color tab 1 From the drop-down list, select any color you like (black, yellow, red, etc.). And in the field Background 2 click on the top line ( No ) . In this case, the color you selected will appear on the monitor screen, which is visible in the middle of the tab. If you like this color, then click the apply button, and then OK. That's it - the monitor screen is painted in your favorite color.
But it will be more beautiful if the screen is not monochrome, but has a background image. The picture can be selected from the standard Windows set. To do this, in the Background picture 2 field, click the cursor on the names of the pictures and these pictures will appear on the screen of the sample monitor. Currently there is a standard Windows XP image called Serenity. Having selected a picture, you click the Apply button, and then OK and this picture will appear on your desktop - on the screen of your monitor.
But, after a while, you will get bored with all the standard drawings and will want to find something new.
Many drawings are available on CDs and on the Internet. You can choose several designs for yourself and then change them every week. To display such a picture, click the Browse button and use Windows Explorer to find the file with this picture on your computer. The selected file will appear in the list Wallpaper 2 Now click the Apply button, and then OK and your picture will appear on the screen.
I only draw attention to the fact that the drawing must be on the hard drive, and not on a CD. That is, the picture you like must first be copied from a CD, and then installed as a background picture.
But perhaps this will not seem enough to you. You will want to use your own photos as the background image. This is also possible.
It is only desirable that the drawing matches your screen resolution. If the screen resolution is 1024 x 768, then the photo size should be the same. Because if the photo is larger than the screen, then only part of the photo will fit on the screen and not necessarily the best part.
If the photo size is smaller than the screen, then you will need to select an option in the Location 4 field. The photo will either have to be placed in the center or stretched, or the screen will be covered with it, which, in any case, will not be very beautiful. This means that the photograph must be prepared in advance.
How to install a screensaver on your computer screen?
How to install a screensaver on your computer - background image
Evbar. Ru, we have topics for discussion
- List of forums ‹· Photo club ‹· Wallpapers, screensavers
- Advanced Search
- Registration
How to install a screensaver on your computer - background image
How to install a screensaver on your computer - background image
How to install a screensaver on your computer - a desktop background?
Let’s make a reservation right away: by a screensaver-background picture we mean a meaningful image in the form of a photo, picture or drawing specially designed for the desktop of a personal computer. In simple terms, this means that the background image has the same dimensions as the size of your monitor screen. Those who don’t know why can look at the topic why do my eyes hurt?
Having understood and understood why, we smoothly move on to the concept of how. Installing a background image on your desktop, as well as all exclusively copyrighted photos, wallpapers, backgrounds, screensavers, pictures and drawings offered on the Evbar Studio website is not easy, but very simple. Taking into account that the majority of visitors to our site use the Windows operating system, we will describe only a few of the most common ways to put a picture on a computer screen.
The most general, suitable for all operating systems (OS) of the Windows family:
- right-click on any free area of the desktop that is not occupied by the program window;
- in the context-sensitive menu that opens, select Properties; in the Properties: Screen window that opens, select the Desktop tab;
- by activating by clicking the Browse button, find the installation folder of your image, and in it the desired background image that was saved in advance, followed by the Open button;
- The selected screensaver will appear in the preview window and in the list of wallpapers in the Properties: Screen window; pressing the OK key will finally install the selected background image on the desktop of your computer.
How to put a screensaver on your desktop if you have Windows XP installed is even easier. We proceed according to the scheme:
- Start -> My Computer, open the folder in which the pictures are stored;
- right-click on the desired background image;
- In the context-sensitive menu that appears, select Set as desktop background.
Well, in conclusion, if anyone knows how else you can set a background image on your desktop, including other operating systems, write, don’t hide it. Your comments on this topic are welcome, and the three most original ways will receive prizes, the opportunity to choose and receive for free any screensaver you like from any topic on your desktop art gallery photo bank Evbar Studio
So, if there are no more questions, let's get started.
The first thing you need to learn is that your screensaver or background image must be stored somewhere! This means that before you can pave your desktop, the image must be physically copied to your computer. And it is advisable to do this in a separate folder-directory. Why, elementary, so that later it (the screensaver) can be easily found. Someone will grin, just think of one picture, and it will do, and he will be wrong. The fact is that the capacity of modern digital information storage devices, which naturally include hard drives installed in your PC (personal computer) and to which the image will actually be copied, is already more than a dozen Gigabytes. Take my word for it, these are a lot of printed pages in book format, it’s just a whole library. This means that without a proper and respectful attitude towards this pile of information, there is a risk of losing it.
Secondly, many sites distributing such images advertise the installation of a background image with one click of a mouse button, directly from the page being viewed on the Internet. Such simplicity can actually result in an increased risk of getting a virus. Miracles do not happen; these actions activate a certain script program, located on the page you are viewing, which ultimately still writes the selected background to your computer. But you no longer control this process! There are exceptions, however, nothing is recorded anywhere, but in this case the picture is on your table as long as there is Internet. This is certainly not a statement, but as they say, the world is not without good people
Our detailed instructions will tell you how to quickly and easily change the screensaver on your PC screen. How to install a screensaver on your computer screen?
Learning to change the screen saver on your computer screen
One of the personalization methods offered by Windows OS is installing a screen saver. It appears on the screen after a certain amount of time the computer has been idle. Typically, the screensaver is presented in the form of an animation, although it is possible to display statistical images or just a black screen. Read our article on how to install or change the screensaver on your computer screen.
Why is it needed on a computer?
Today, a skinsaver, in most cases, plays a decorative role. But not so long ago, they were used to preserve CRT-based monitors and plasma screens, which deteriorated (burned out) from static images. Fortunately, LCD monitors do not have this problem.
Our useful article will teach you how to register for the Steam service - http://forzapc. ru/zaregistrirovatsya-v-steam. html
Can't open MDF or MDS files? It's okay, we'll teach you - http://forzapc. ru/kak-otkryit-fayl-mdf-i-mds. html
Installing a screensaver on Windows 7 and 8
The easiest way to do this is as follows:
Place the cursor over an empty area of the desktop, right-click and select “Personalization”.
In the bottom panel of the window that appears, we find the “Screensaver” icon. Below it there will be an inscription displaying the status of the screensaver. In our case it is missing. Click on the icon.
The “Screen Saver Settings” window we need opens. On the monitor image you can see a demonstration of the current screensaver. If it is not there, then a screenshot of the screen will simply be displayed there.
In the drop-down list you can select one of the proposed screensavers. In this case, an example of its operation will be displayed on the monitor image. And by clicking the “View” button, you will see the screensaver in its full glory.
You can return to the selection by simply moving the mouse. Now it remains to set the time interval after which the selected screensaver will appear on the screen. Please note that the countdown begins from the moment you stop performing any actions on the computer. Click “Ok”.
Please note that after selecting the “Volume Text” screensaver, you should click on the “Options” button.
In the window that opens, you can enter the desired text yourself, set its size, font, rotation type, etc. Instead of text, you can immediately set the display of the current time. Click "OK" to save the changes. You can see what happened on the monitor image.
The instructions given are suitable for Windows 7 and Windows 8, but with Windows 10 everything is a little more complicated.
Installation features on Windows 10
In this case, simply opening the “Personalization” section from the desktop will not work. But there are several other ways.
Firstly, you can open the search and enter the word “Screensaver”. In the results, click “Turn the screen saver on or off.”
Secondly, you can open the Start menu → Settings → Personalization → Lock Screen. At the bottom, click on “Screen saver settings”.
Thirdly, you can open the “Run” window (Win + R), enter “control desk. cpl,1" and click "OK".
How to put your own image
To do this, you need to create a separate folder on your computer and place one or more desired images there. Next, select “Photos” from the drop-down list and click “Options”.
In the next window, click the “Browse” button and select the folder with your image(s). Then we set the display speed and, if necessary, check the box for random display of images. Click “Save”.
How to add new pictures?
Some may not be satisfied with the small variety of screensavers available by default, so you can try adding new ones. To do this, you will need to find new screensavers in the format on the Internet. scr.
These files should be placed in the path C:WINDOWS\System32. By the way, you can find other pre-installed screensavers there and double-click them to launch them. If you wish, you can create a shortcut to the desired screensaver, place it on your desktop and launch it when needed, without waiting for downtime.
Want to quickly clean up your PC from junk? Then our article will tell you how to quickly do this, read here.
Do you want to defragment your hard drive, but don’t know how? Our instructions will show you the whole process, see below.
And the added screensaver can now be seen in the list.
Conclusion
So we figured out how to install a screensaver on a computer or how to change the current one. There shouldn’t be any particular difficulties, unless you have to look for the right panel on Windows 10. You can choose pre-installed screensavers or use downloaded ones, but remember that in the latter case there is a high probability of encountering viruses.
When using any of the above methods, you will eventually open the “Screen Saver Settings” window, where you can perform all the necessary manipulations.
Changing the background image and screen saver on the computer Initially, on computers with the Windows Operating System installed, the background image is already installed. And, most often, this is How to install a screensaver on your computer screen?
Changing the wallpaper
and screen saver on your computer
Initially, on computers with installed Operating
Windows system already has a background image installed.
And, most often, this is a background image with the Windows logo.
The screen saver is not installed initially.
But it can be installed and then changed.
how to change computer screen background
How to change
screen background
this option is not available.
So, the path to changing the background image begins
from the “Start” button → select “Control Panel” on the right.
In the “Design” section, select the function
"Changing the desktop background."
The following window will open.
This window contains desktop backgrounds. You need to click on the image you want to make the background. Then select the position of the image at the bottom - on the “Fill” button
In addition to choosing a ready-made Background, you can choose any other image. From those that are downloaded to your computer. To do this, in the “Image Location” section, click on the arrow. A context menu will open.
You can select "Image Library". And when yours open
folders with images - select the one you need. Or click the “Browse” button.
And also select the image in the desired folder.
And when the image appears in the window for setting the desktop background, do the same as for the finished Background. Click on the selected one. Select the position of the image at the bottom - on the “Fill” button, select the position of the image. And then click the “Save Changes” button at the bottom.
what is a screen saver and how to install it
What is a screen saver
and how to install it
A screen saver is just that: a screen saver. Depending on the one selected, it appears either against the background of the Wallpaper, or instead of it at a time when the computer is turned on and is in a pause state. That is, you do not use a mouse or keyboard. Or just walk away from the computer.
As soon as you touch the mouse with your hand or click
press the keyboard button – the screen saver disappears.
Installing a screen saver on Windows 7 (initial) is also available.
The path to installing a screen saver begins with the “Start” button → select “Control Panel” on the right → click on the “Appearance” button. The following window will open.
In the “Screen” section, select “Change screen saver”.
The Screen Saver Options tab opens.
Initially, the screen saver is not installed. Therefore, in the “Screen saver” parameter it is set to “No”. To see the selection of available screensavers, click on the arrow. A context menu will open.
Before installing the screen saver, you can preview it first. To do this, select the screensaver and click the “View” button.
The selected screensaver will be reflected on the tab screen.
If you like the screensaver, you can set the interval.
Interval means that if you set the interval to 1 minute,
then 1 minute after you stop doing something
on the computer – the screen saver will turn on. And it will work
until you touch the mouse with your hand or click
to a keyboard key.
After setting the interval, first click the button at the bottom of the tab
"Apply" and then "OK". And the screen saver will be installed.
If you change your mind about using a screen saver, follow the path
to the “Screen Saver Settings” tab again. And select
in the Screensavers section "No".
To help
for beginners
If you're bad
own a computer
and keyboard - the pages of this site will help you:
My computer
And
Acquaintance
with keyboard
If you don't know how to work
with text - select, copy, save - read on the page
Simple editing
I’ll say right away that changing the background image to
today - not available for all versions of Windows.
In particular, for Windows 7 (starter) -
this option is not available.